# Topページの作成5
`TopPage.tsx`を**リファクタ**(コードの整理)をしましょう。
まず、ログインしていない場合、上部のヘッダー部分は共通する部分になりますので、コンポーネントとして切り出しましょう。
`components/templates`配下に`NotLoginLayout.tsx`を作成しましょう。
そして、そちらにmainタグまでの部分を貼り付けましょう。
export const NotLoginLayout = () => {
  return (
    <div className="relative">
      <header className="bg-white leading-[50px] fixed top-0 left-0 right-0">
        <div className="container mx-auto flex justify-between">
          <p className="logo">スケジュール管理APP</p>
          <nav>
            <ul className="flex gap-5 text-lime-800">
              <li>ご利用方法</li>
              <li>ログイン</li>
            </ul>
          </nav>
        </div>
      </header>
      <main className="pt-[50px] bg-gradient-to-r from-lime-100 to-lime-200 h-screen flex flex-col justify-center items-center">
      </main>
    </div>
  );
}
そして、propsとして`children`を受け取れるようにし、mainタグ内に`children`を埋め込みましょう。
import { ReactNode } from "react";

type PropsType = {
  children: ReactNode
}

export const NotLoginLayout = ({ children }: PropsType) => {
  return (
    <div className="relative">
      <header className="bg-white leading-[50px] fixed top-0 left-0 right-0">
        <div className="container mx-auto flex justify-between">
          <p className="logo">スケジュール管理APP</p>
          <nav>
            <ul className="flex gap-5 text-lime-800">
              <li>ご利用方法</li>
              <li>ログイン</li>
            </ul>
          </nav>
        </div>
      </header>
      <main className="pt-[50px] bg-gradient-to-r from-lime-100 to-lime-200 h-screen flex flex-col justify-center items-center">
        {children}
      </main>
    </div>
  );
}
そして、`TopPage.tsx`にてNotLoginLayoutコンポーネントを作成するようにしましょう。
import { NotLoginLayout } from "../templates/NotLoginLayout";

export const TopPage = () => {
  return (
    <NotLoginLayout>
      <div className="text-center">
        <h1 className="text-7xl logo">スケジュール管理APP</h1>
        <p className="pt-[10vh] text-5xl">
          お互いのスケジュールを管理するアプリです
        </p>
        <div className="pt-[20vh]">
          <button className="bg-lime-800 text-white p-4 text-lg rounded-lg">
            ログイン
          </button>
        </div>
      </div>
    </NotLoginLayout>
  );
}
次にbutton部分は今後使い回すので、コンポーネントとして切り出しましょう。
`components/atoms`配下に`PrimaryBtn.tsx`を作成し、ログインボタン部分を貼り付けましょう。
export const PrimaryBtn = () => {
  return (
    <button className="bg-lime-800 text-white p-4 text-lg rounded-lg">
      ログイン
    </button>
  );
}
ボタンのテキストに関しては、様々な部分にて使い回すのでchildrenとして受け取れるようにしましょう。
import { ReactNode } from "react";

type PropsType = {
  children: ReactNode
}

export const PrimaryBtn = ({ children }: PropsType) => {
  return (
    <button className="bg-lime-800 text-white p-4 text-lg rounded-lg">
      {children}
    </button>
  );
};
そして、PrimaryBtnコンポーネントを`TopPage.tsx`にて使用しましょう。
import { PrimaryBtn } from "../atoms/PrimaryBtn";
import { NotLoginLayout } from "../templates/NotLoginLayouts";

export const TopPage = () => {
  return (
    <NotLoginLayout>
      <div className="text-center">
        <h1 className="text-7xl logo">スケジュール管理APP</h1>
        <p className="pt-[10vh] text-5xl">
          お互いのスケジュールを管理するアプリです
        </p>
        <div className="pt-[20vh]">
          <PrimaryBtn>ログイン</PrimaryBtn>
        </div>
      </div>
    </NotLoginLayout>
  );
}
ここまでの作業をcommitしましょう。
```bash
git add .
```
```bash
git commit
```
commitメッセージは、
```
refactor: ヘッダー部分のレイアウトとボタンをコンポーネントに切り出した
```
としましょう。
ではTopページの作成が完了したので、GitHubにpushしましょう。
```basic
git push origin feature/top-page
```
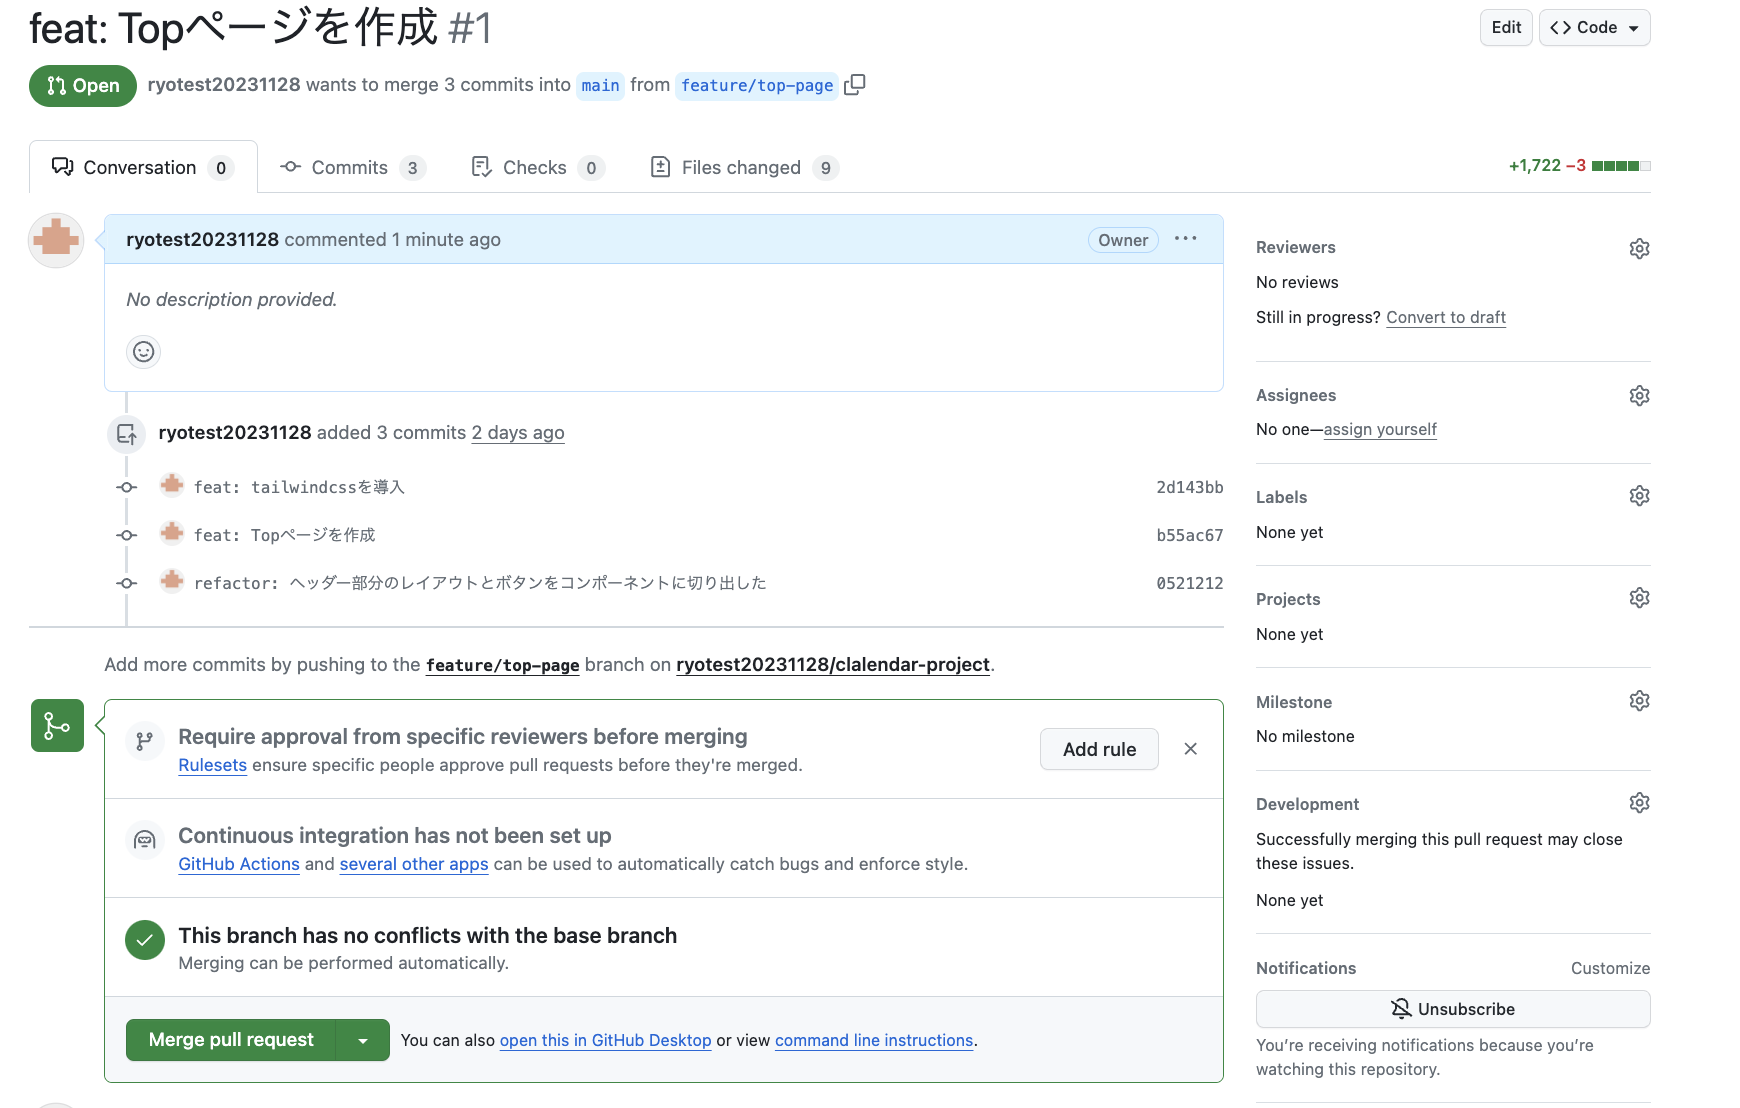
これでGitHubのリポジトリのページにいき、main <- feature/top-pageのPRを作成しましょう。
 作成したら自身で`Merge pull request`を押してmergeしましょう。
 mergeが完了したらWarpに戻り、mainをpullしましょう。
```bash
git switch main
```
```bash
git pull origin main
```
mergeが完了したらWarpに戻り、mainをpullしましょう。
```bash
git switch main
```
```bash
git pull origin main
```